What you’ll need
- A Pair WordPress Hosting Account
- A Mailchimp account
- Optional: Pair Site Staging Enabled to Test Site Changes
What’s So Great About an Opt-In Form?
Opt-in forms are a way for you to gather a group of people who are interested in your business. Whether you run a blog, manage an e-commerce site, or promote a different type of online presence, using an opt-in form can open up new avenues of communication.
When someone uses an opt-in form, they’re signing up to be a part of a greater list. You can use this list to generate leads and create a base of people who could turn into customers or recurring visitors. You can send them promotions, newsletters, or other materials that they might find useful or enticing.
But before you can do that, you need to create an opt-in form. Without the opt-in form, it will be hard to grow your list from your website. We’ll be going over how to set up an opt-in form using a popular email manager called Mailchimp.
What is Mailchimp?
Mailchimp is a popular marketing platform known for its email lists. They allow you to create different email lists (called “audiences”) so you can diversify your marketing tactics. They also have a great opt-in form creator that you can use on your site. When using a Mailchimp opt-in form, entries will automatically be added directly to your Mailchimp email list. Then, when you want to send a communication, you can use Mailchimp’s email tools to build and send an email to those who have opted in.
One of the best things about using Mailchimp is that people are added automatically when they sign up. That means no extra work on your end. You can set it up, then leave it be. The only time you’ll have to interact with the list is when you’re sending out new communications!
Excited for your new opt-in form? Great! We’ll be walking you through the exact set up steps in the next section.
Step 1: Create Your Opt-In Form with Mailchimp
The first step to creating an opt-in form with Mailchimp is to sign in to your Mailchimp account (or create one if you don’t already have one).
If this is your first time in Mailchimp, you’ll also need to first create an audience (which is what Mailchimp calls your email list). You can do so by:
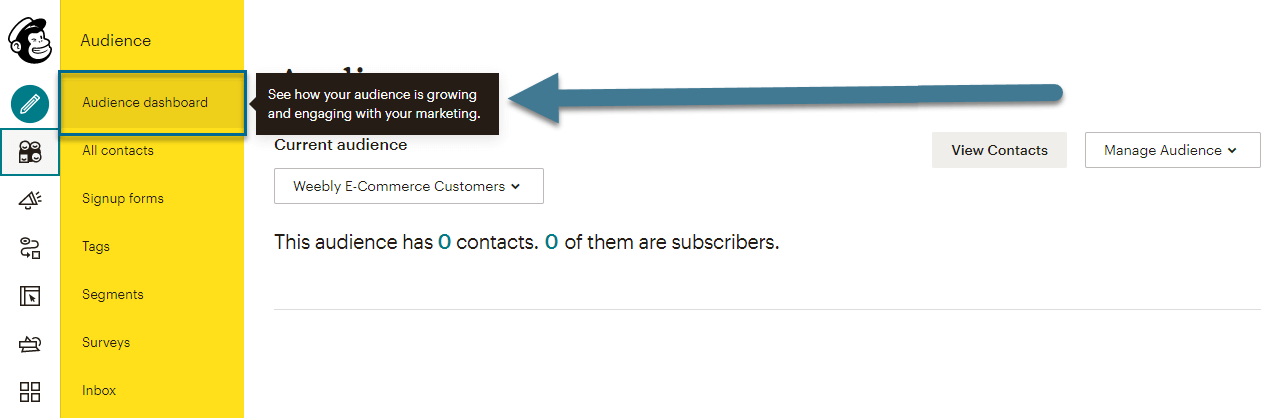
- Going to the left navigation bar, clicking Audience, then clicking Audience Dashboard in the drop-down.
- Then on the right side of the screen, find and click the Manage Audiences tab.
- In the drop-down, click View audiences.
- Then at the top of the next page, click the Create Audience button. This will take you through the audience creation process.


Once you have an audience created, it’s time to create your opt-in form!
To do so, follow these steps:
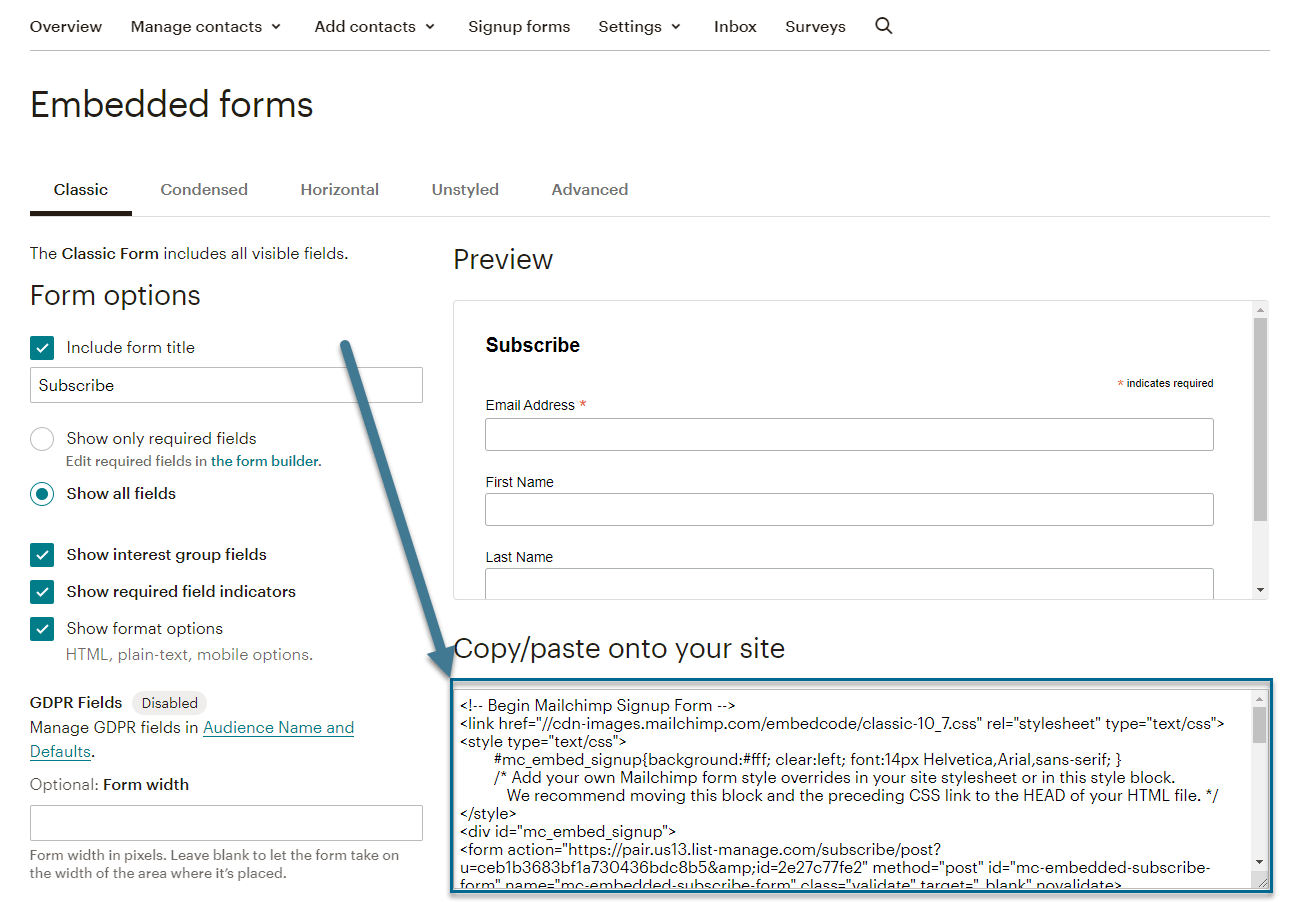
- Go to the left navigation bar and click Audiences. A drop-down will appear. In this drop-down, click Signup forms
- Then, under the Current audience header, select the audience you wish to create a form for.
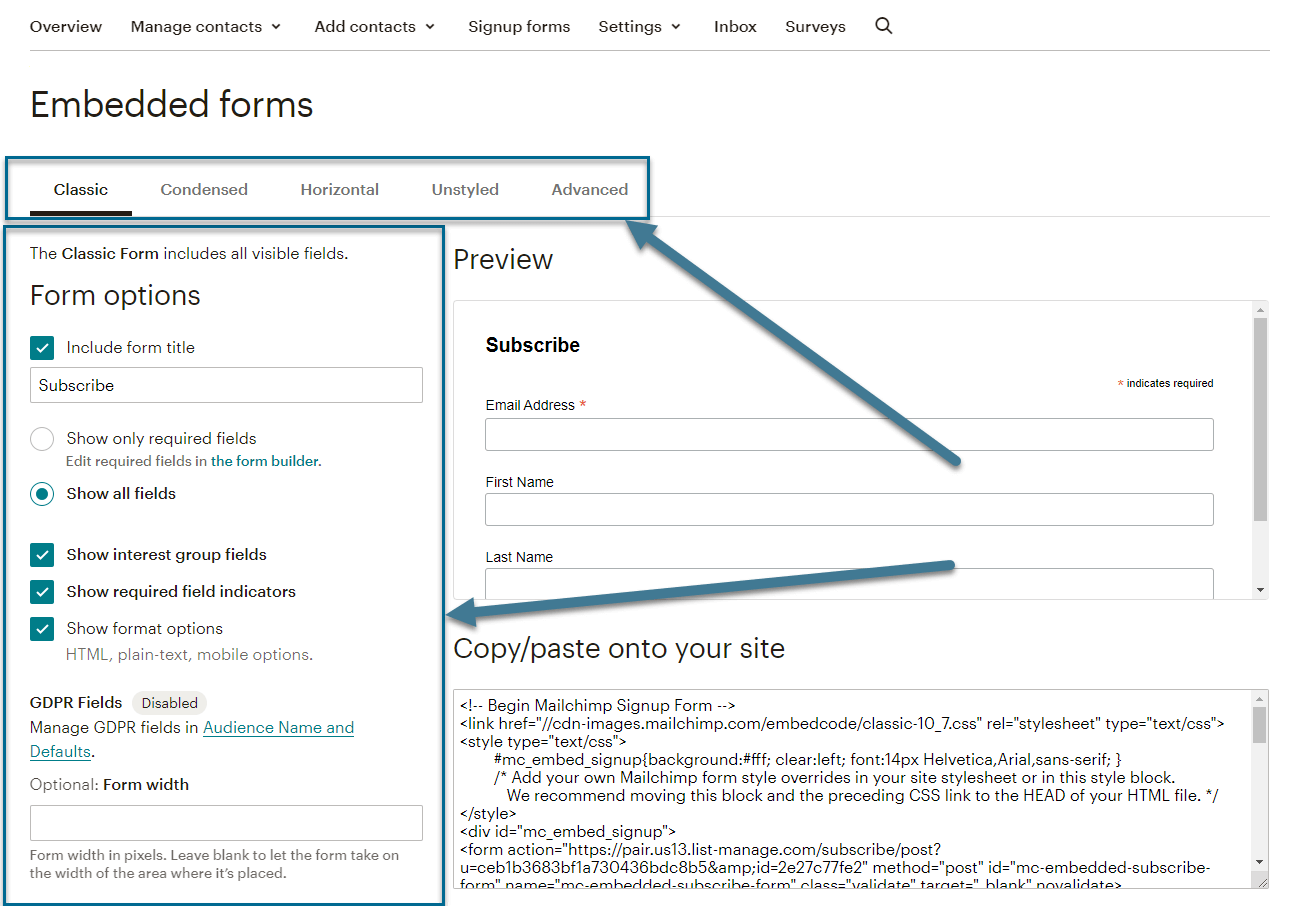
- Next to Embedded forms, click Select
- In the left sidebar, you will see a list of form options. Edit the form options as you see fit. Note that you can change the form type by selecting Classic, Condensed, Horizontal, etc.
- Copy the code under the Copy/paste onto your site header

And that’s it for the Mailchimp side of things. Now it’s time to add the form to your WordPress site.
Step 2: Add Your Opt-In Form to WordPress
Log in to your WordPress site and navigate to the editor of the post or page where you’d like to add the form. Note that the steps may change based on the editor type you are using. There are two types of WordPress editors: the Gutenberg editor and the Classic editor.
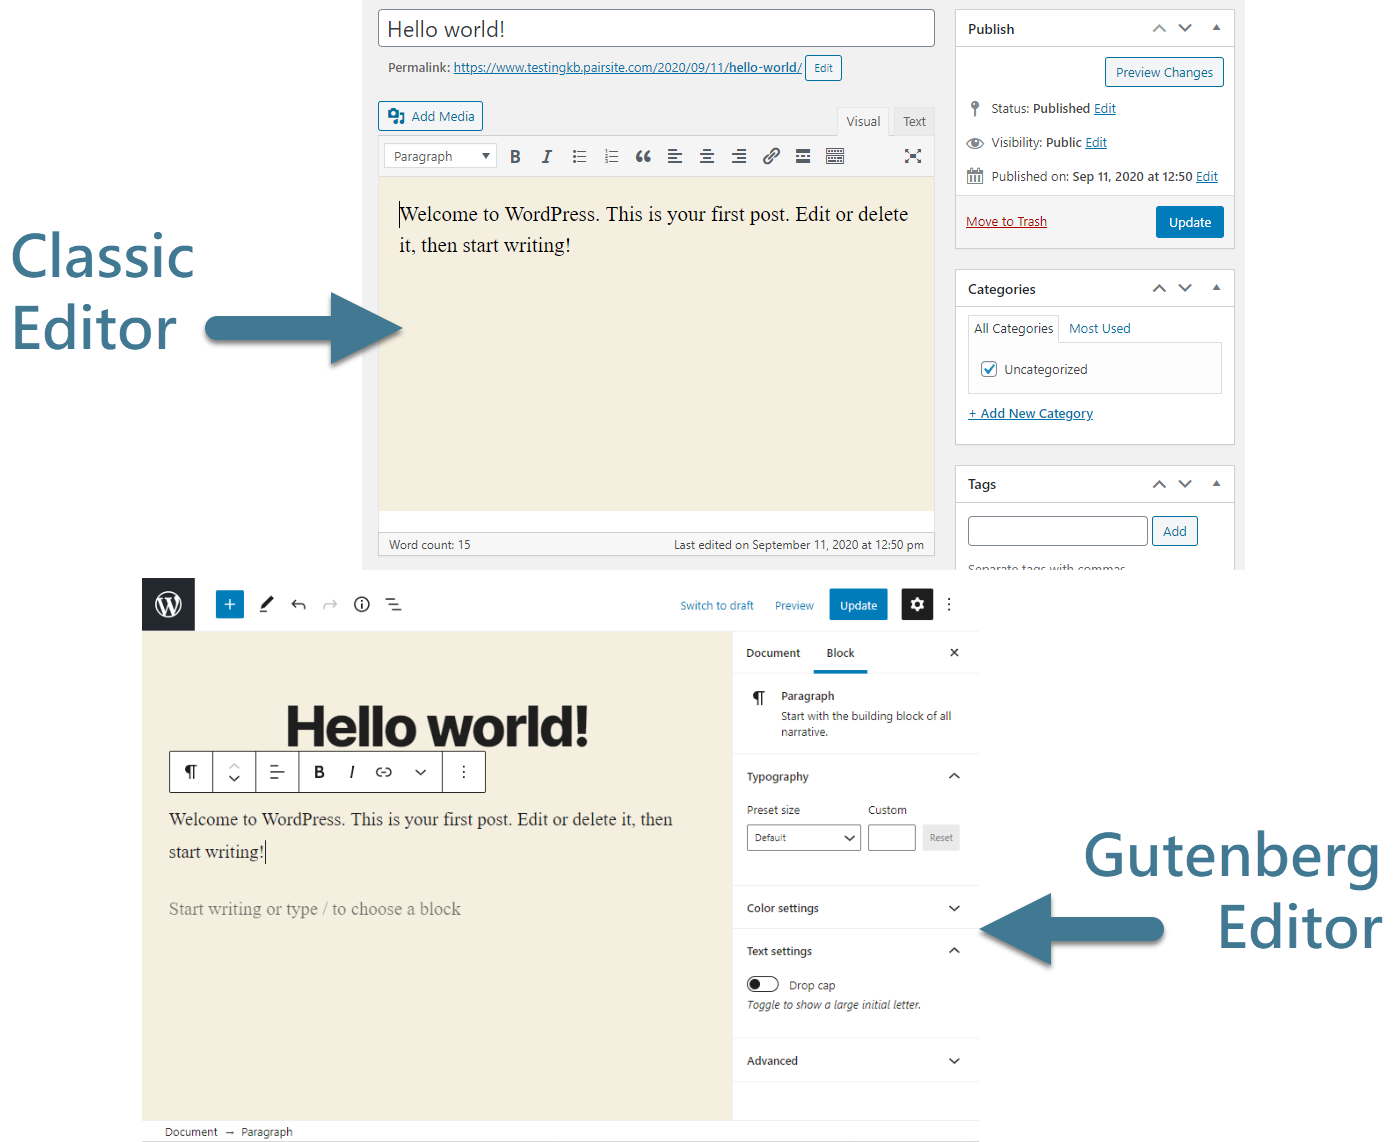
You will need to know which type of editor you have before continuing. Go to the tutorial that fits your editor:
- Classic Editor: Adding an Opt-In Form
- Gutenberg Editor: Adding an Opt-In Form
Classic Editor: Adding an Opt-In Form
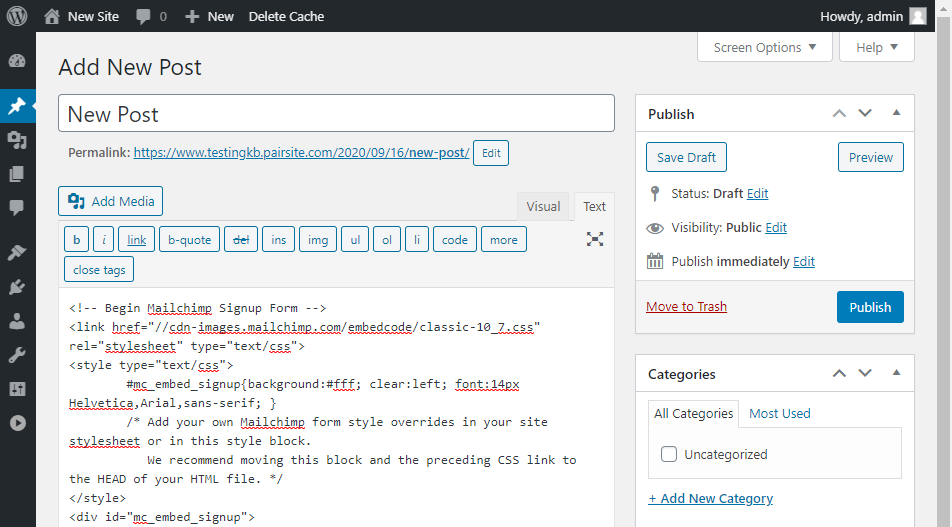
Once you’ve logged in to your WordPress, navigate to the page or post you’d like to add the form to. Once there, click on the Text tab in the toolbar.
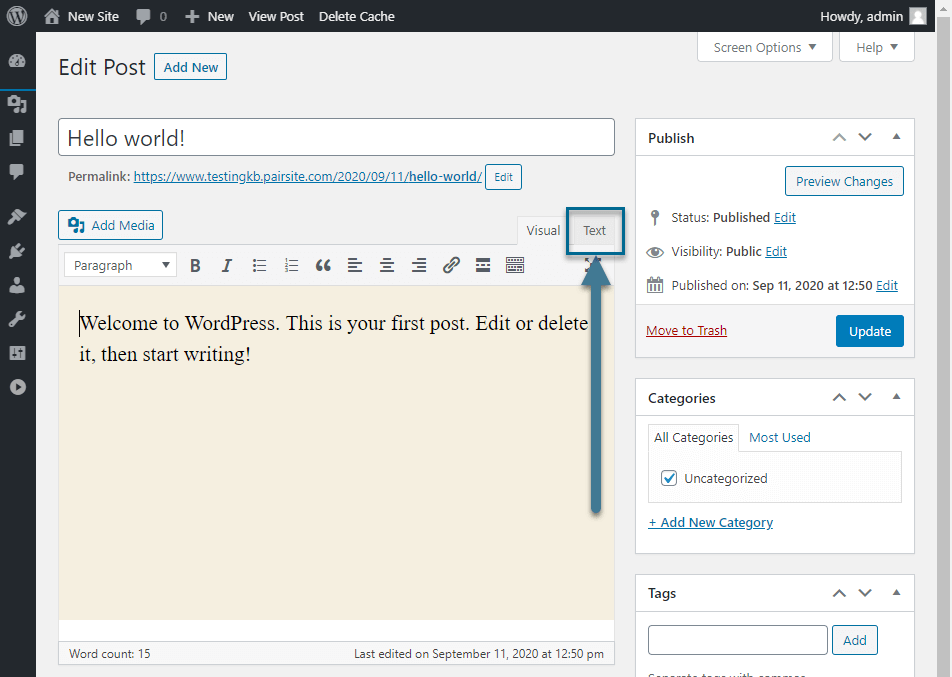
This will open up the HTML editor for your post or page. Navigate to the location where you would like to add the post, then paste the code you copied from Mailchimp.
To see what your form looks like (and to make sure it is displaying correctly), you can use the Preview button in the top right corner of your screen. Once you are satisfied with your form, you can Update or Publish your post.
Gutenberg Editor: Adding an Opt-In Form
Once you have logged in to your WordPress admin interface and determined that you are using the Gutenberg editor, follow these steps to add an opt-in form:
- Add a Custom HTML block in the location where you’d like the form
- Paste the code from Mailchimp into the HTML block

You can click Preview in the block’s toolbar to preview your form on the page. When you’re content with it, Update or Publish the post.
And that’s it!
And that’s all there is to it! Now you can sit back and relax and watch your new email list grow. You can use Mailchimp to send this list promotional material, educational material, or whatever you want! When people opt-in to receiving your communications, you’ve been given a chance to further your brand and your business in their eyes. Don’t let the opportunity go to waste!
Like tutorials and tips and tricks like this? Consider signing up for our WPMinute newsletter! We send out short tutorials, WordPress news, and other WordPress-related goodies every week. Interested? Subscribe here (and check out the opt-in form we created using the method we just taught you)!


