
What You’ll Need:
What is WordPress?
WordPress is a CMS (or Content Management System) that makes it easy to build websites. We’ve put together a guide to help you use WordPress to design your very own e-commerce site! Don’t worry – the process is simple. We have all the tools you need right here at Pair Networks to get you started. We’ll cover:
- Who WordPress is right for
- How to create an e-commerce site with WordPress
If you have any questions about getting started with a WordPress e-commerce site, we’re here to help!
Who is WordPress E-Commerce Right For?
WordPress CMS is very user-friendly, making it a great choice regardless of your technical background. So whether you’re just starting out or the head of a vast e-commerce empire, WordPress has the tools you need to create a professional-looking, functional e-commerce site.
Getting Started with WordPress
And we have all the tools you need to use WordPress! We mentioned these two things earlier, but before you get started with your e-commerce site, you’ll need:
These two things are necessary if you’re going to create a professional, branded e-commerce site. With tools like automatic backups, like automatic backups, site staging, and free SSL certificates, our WordPress Managed Hosting will give you everything you need to create a successful online store.
A custom domain establishes your brand and separates you from the rest of the internet.Not sure what domain name to choose? Here are some best practices to get you started.
Setting Up WordPress
Once you have a WordPress hosting account and a custom domain, you can start building your e-commerce site.
Step 1: The first step in this process is to create a WordPress site on your hosting account. If you have one of our WordPress hosting accounts, this process is easy. See instructions here.
Step 2: Once your site has been created, enter its admin interface. This is the area where you’ll manage, edit, and design your e-commerce site.
Step 3: Now to transform your WordPress site into an online store. The easiest way to do this is by adding a plugin. We’ll be walking you through how to create an e-commerce store with WooCommerce.
To install WooCommerce, go to the plugin directory and search for “WooCommerce.” Then click the Activate, then Install button. If you’re not familiar with how to add a plugin, you can check out this tutorial for instructions.
Once the plugin is activated and installed, you’re ready to start your store setup
Store Set Up
When WooCommerce is installed, it will ask you to first complete a basic set up process. This will establish your store information and background.
There are various steps to the initial set up process, like store details, your industry, the type of products you offer, etc.
There are only a few steps, but if you want to expedite the process, it’s a good idea to have these details ironed out beforehand.
Store Details
You’ll need to enter your store address. The store address is required, even if your store is 100% virtual. This is necessary so that people can return products to you.

Not sure what address to list? Here’s a good guide to help you choose the best method for business addresses.
Note: It’s important to check your local laws before deciding on a business address. Some locations may have different laws than others.
Industry
You’ll also want to think about what industry your products fall under. Fashion? Health? Art? Food? There are a number of categories you can select. If you fall outside the supplied categories, you can select Other and enter your desired category.

Product Types
The Product Types step will ask you to check all the product types you plan on offering. There are a variety of products you can select from, like physical products, downloads, subscriptions, and more. It’s important to note that some product types require an additional fee to unlock, like subscriptions or bookings.

Business Details
For the Business Detail step, you’ll need to select the number of products you expect to offer and whether you currently sell elsewhere.
You can also enable popular integrations during this step, such as Facebook Marketplace, MailChimp, and Google Ads. Note that enabling these integrations will automatically download the necessary plugins.

Theme
The final step in the initial setup process is to choose a theme. A “theme” is essentially a site template. When you choose one, it will influence your site’s colors and layout. WordPress offers a variety of themes for all sorts of sites. You can swap them out at any time if you want to change up your site.

When choosing a site theme, it’s important to select one that’s designed for an e-commerce site. E-commerce themes will have layouts and designs built around your product offerings. This means it’ll include things like product lists, etc. So it’s important to choose a theme that will mesh well with your overall site goal: selling things. To be sure you’re choosing an e-commerce compatible theme, you can click on the live demo button on any theme to explore the it’s layout.
After Initial Setup
After the initial setup, you’ll be taken back to the WordPress admin interface. However, your site setup isn’t quite done yet. There are a few things you should check out before publishing your site.
The initial setup supplied the necessary information, but you’ll need to finish up the last important steps, like finalizing your site design and setting up taxes. Luckily WooCommerce provides an easy way to access the last few steps. All you have to do is go to the left sidebar in the WordPress admin interface and click WooCommerce. The WooCommerce interface will appear, listing what steps you still need to complete before going live with your site.
Noteworthy WooCommerce Tools
After you’ve completed those final steps, you can publish your site. Congratulations!
But the process doesn’t end there – you have a brand new e-commerce site to run! So we’ve included some helpful interfaces that you may need down the line. It’s a good idea to familiarize yourself with these so you know where to go in the future.
Products
You’ve likely already added products during the initial WooCommerce setup. However, what do you do if you need to make product changes? You can go to the main Product interface to make all your product changes! Whether that’s adding new products, deleting ones that aren’t selling, or just making a few tweaks, the product page holds all the tools you need.
You can find the Product interface by going to the left sidebar in the WordPress admin interface and clicking on the Products tab.

This will take you to the Products interface, where you can add, remove, and edit your products.

Bonus Tip: this interface also allows you to monitor product stock, reviews, and orders.
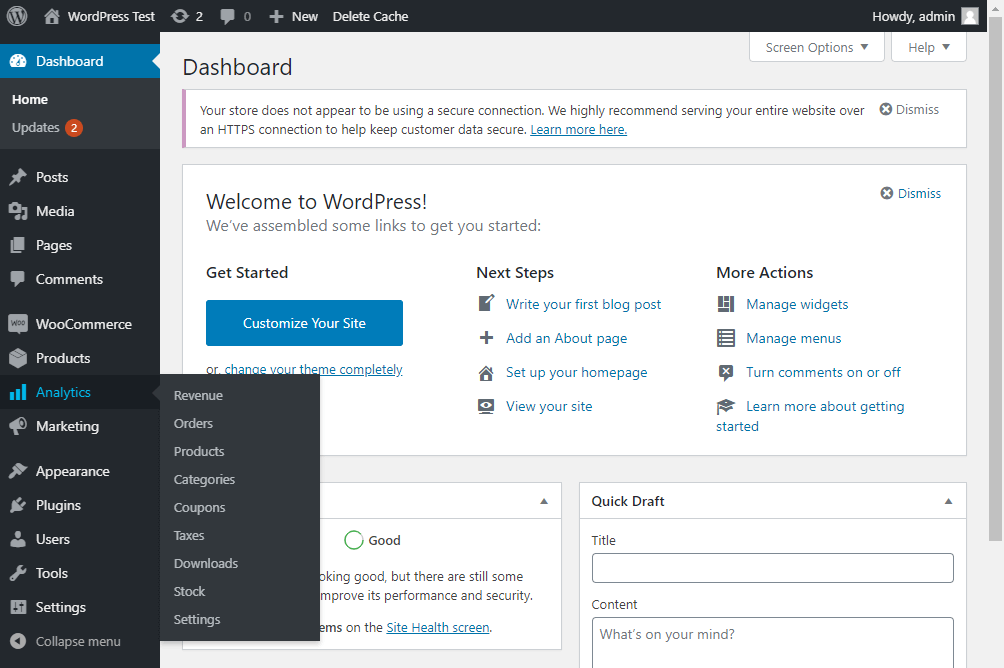
Analytics
The next section you should visit is the Analytics section. You can also navigate to this interface through the left sidebar. Just find and click the Analytics tab.
From this page, you’ll see helpful store information, like revenue, returns, shipping, and much more. When running an e-commerce store, knowing what’s selling and what’s not is pivotal.
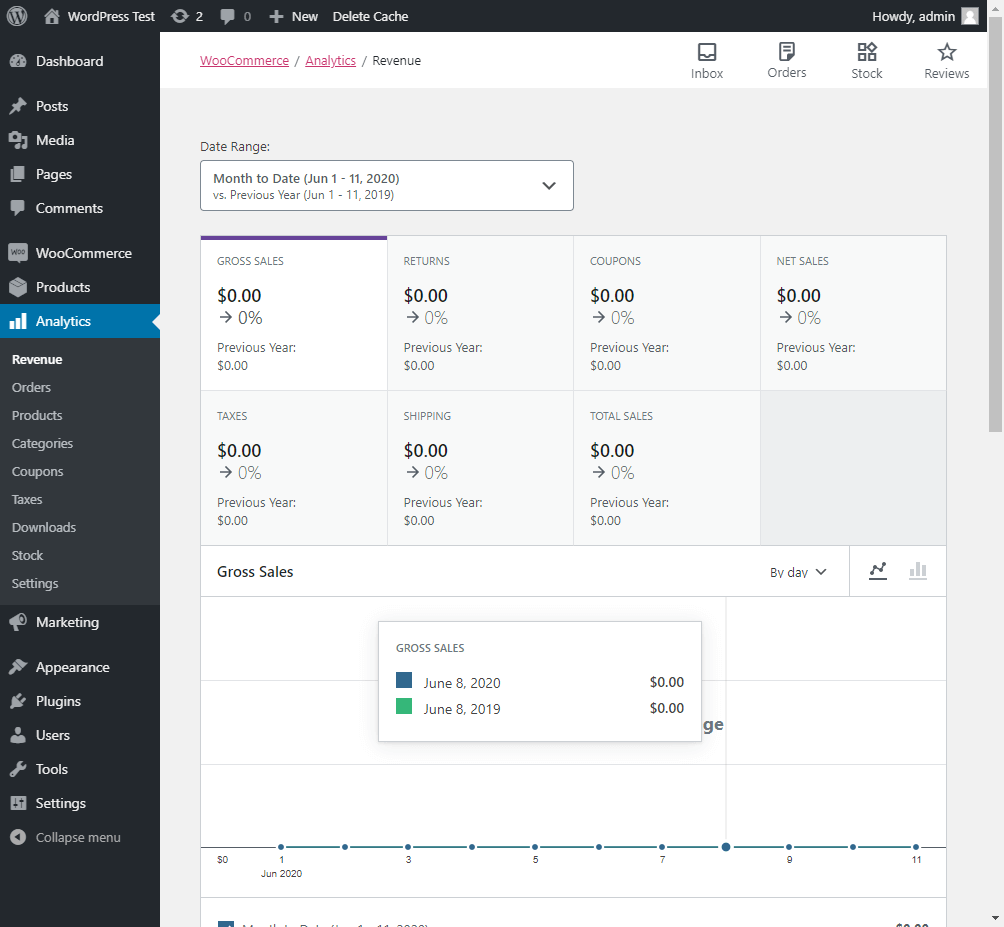
So familiarizing yourself with this interface is a step in the right direction. Plus, there’s so much information you can glean here. Since it’s all in one place, you never have to run around and compare stats. It’s easy to figure out how your site is performing.
Going Live with Your E-Commerce Site
And that’s it! E-commerce with WordPress is just a plugin away. There are many other great features of WooCommerce that we didn’t cover here, but these are the basics to get you started. One of the greatest things about WordPress e-commerce with WooCommerce is how easy it is to make changes. You can swap themes for a new site design, manage products from one interface, and see all your site analytics in one place.
Bonus Tip: If you’re using one of our WordPress managed hosting accounts, you can use the staging site feature to test changes to your site without affecting your live site.
And if you’re not a fan of WooCommerce, don’t worry! There are many other great e-commerce plugins out there.


