What You’ll Need to Get Started
To get started building an e-commerce site with Weebly, you’ll first need:
What is Weebly
If you’ve been shopping around for the best e-commerce, you may have come across Weebly. It’s a drag-and-drop builder, often touted for its ease of use and clean design. But does Weebly have what it takes to build an e-commerce store?
It does, in fact! Weebly has a built-in e-commerce option designed to seamlessly integrate with their website builder. You can build a fully functional website around your e-commerce site in minutes.

With a variety of different site templates (Weebly calls them “themes”) to choose from, you can easily use Weebly to create a blog, portfolio, event site, or online store. Their website builder was developed to help those with zero coding experience create professional looking websites.
Their online store uses a separate builder than their main website builder, but lacks none of the ease-of-use. It’s a very straight-forward interface, giving you categories to fill out so that you can ensure you’ve covered all the e-commerce bases before launch. From selecting a payment method to setting up taxes, Weebly will hold your hand through all of it.
Who is Weebly For?
Weebly is for those who are looking for an easy, non-intensive website creation process. With no code involved, you can set up a professional-looking website in minutes. It is especially ideal for beginners looking to start a new, small online store.
With a Pair Shared Hosting Account or a Pair Domains custom domain, you can create a free Weebly test shop to get an idea of what it will look like before you commit.
Whether you’re a website novice or just looking for a quick website setup, Weebly has the tools you need to create a functional, yet impressive website.
Getting Started with Weebly
In order to create a Weebly website, though, you need to first ensure you have all the tools to get started. As we mentioned earlier, you will need:
The Pair Shared Hosting account comes with Weebly built-in to its offering, so the Weebly set up process is streamlined and logical.
A custom domain brands your site by giving it it’s own URL. That way, visitors will be able to remember your site address.
Once you’ve obtained these resources, you can begin the site setup process. Learn more about how to set up Weebly on a Pair Shared Hosting account in our video series, Building a Website with Weebly.
Once you have Weebly setup on your account, you can begin the site set up process. This process consists of a few basic steps:
- Select a theme
- Designing the front page
- Setting up your store
- Publishing your site
Select a Theme
“Themes” are Weebly’s name for site templates. They dictate how your site will appear and what layout it has. Of course, you can edit this as you desire. But the Weebly site theme sets the foundation for your site later on.
Weebly has website themes directly designed for e-commerce sites. While the initial theme selection screen doesn’t have a dedicated category for online shop websites, you can identify e-commerce themes by clicking on them and perusing their stock pages.

If they have a page that holds products, like the example below, they will work as an e-commerce theme.
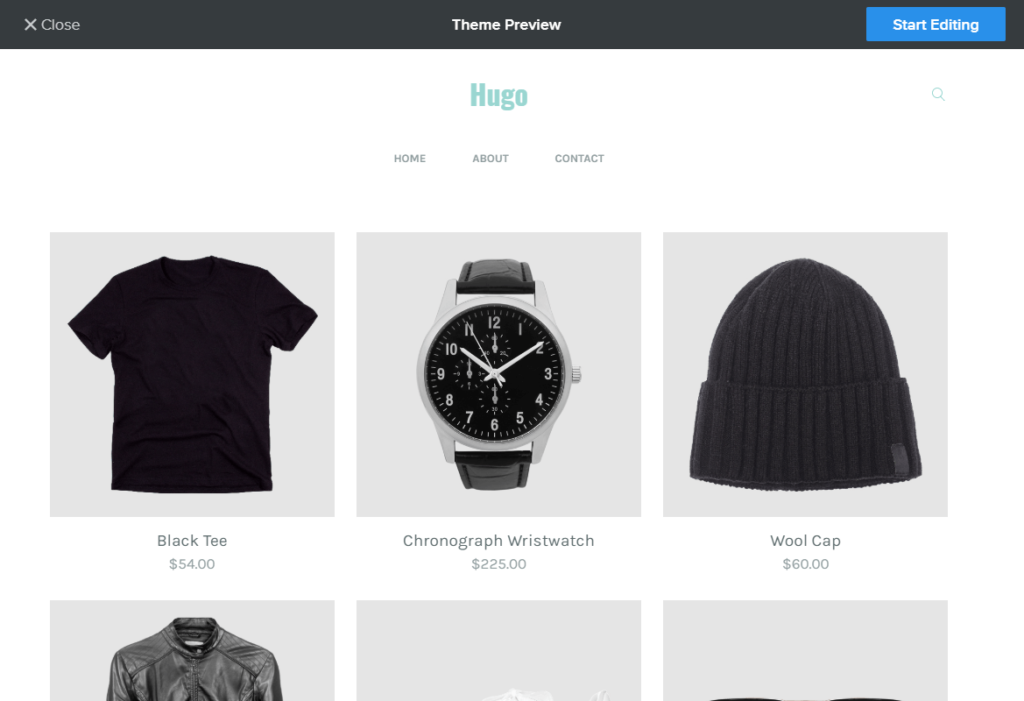
If you decide you don’t like the theme, you can return to the Theme Gallery. After the initial selection, the Theme Gallery changes slightly, so you can easily search for e-commerce themes by selecting the Online Store tab.

You can preview any of the themes in the Theme Gallery. When you find the perfect theme, you can apply it to your site and begin the editing process.
Designing the Front Page
After you have applied your new theme, it’s time to dive into creating your site. Your first order of business is to set up the main page. The main page will differ, depending on the theme you choose. However, you will be able to use the block builder to add or remove site elements to really make the website your own.
Keep in mind that sometimes e-commerce themes have a blocked out area that’s reserved for your online products. You will not be able to drag and drop elements within this space. However, you can edit the elements around it. Don’t worry if the e-commerce space is blank when you first start editing the site.
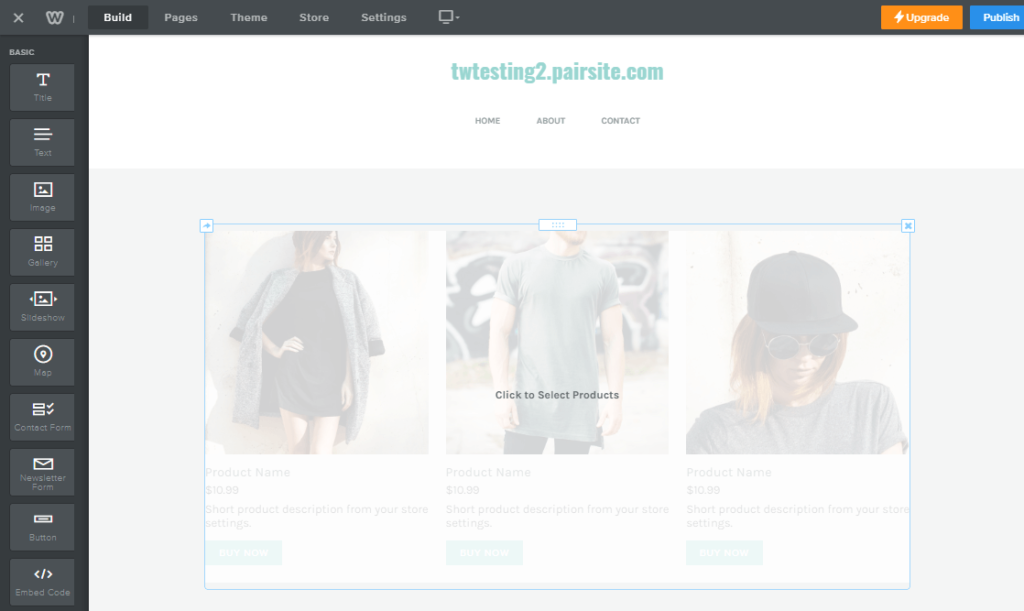
This is normal, since you haven’t created your online shop yet. We’ll walk you through that process in the next section. At the end of the process, your blank e-commerce space will be filled with store information and products.
The Weebly Store
While Weebly’s e-commerce creation process is different from their normal drag-and-drop interface, the e-commerce process is also very straightforward.

There’s no coding knowledge required – you just use their interface to enter your new shop information and Weebly takes care of the rest. You can get to the Weebly store builder by clicking on the Store tab in the top navigation bar.

Quick Guide to Weebly E-Commerce Setup
The Weebly Store set up consists of several categories, each of which play an integral role in your e-commerce site. In order to ensure your online shop functions correctly, you should complete all of these categories.
We’ll go through each category so that you’re prepared for everything.
Store Information
The store information is what it sounds like: information about your store! This category will be a mix of informative details and site options.
For example, you’ll need to supply a physical address for your online shop. If your shop is strictly online, this may seem confusing. However, it’s necessary in order to give customer’s their receipt of purchase.

In this section, you’ll also choose the type of measurement units you prefer, site product layout, your social icons, and set up any third party tracking. There is also a section that lets you show the customer an item’s status, such as “On Sale” or “Sold Out.”
Items
When you have finished entering your basic store information, it’s time to add your products! You can sell a range of items, from physical to digital to service.

Once you’ve selected the type, you can fill out much more information about the product, like a description, pictures, shipping weight, etc.You can add options (like different sizes or colors) and modifiers (special customizations, like custom text).
Weebly even allows you to give your product an ID so that you can keep track of your items. At the very end of each item sheet, there is a section where you can enter the product’s SEO. This is a good thing to fill out if you want your website to perform well in searches. Read more about SEO here.
Payment
How you accept payments is important. After all, you want the reward for your hard work! Regardless of whether the money you receive is for a product or donation, you need some way to process that money.
Luckily, Weebly has integrations that will make payment processing a breeze. All you have to do is choose one. You have three choices:

You’ll need to first have an account with the payment processing tool of your choice. But once you do, all you need to do is “connect” the account by logging in.
Shipping
It’s important to consider shipping if you’re selling a physical product. However, Weebly has a straightforward shipping interface to help you ensure everything runs smoothly. You can add “Shipping Rules” that will allow you to charge certain rates for shipping dependent on the country or continent. That way, you don’t have to worry about undercharging shipping fees and then having to make up the difference.

There are also options in this interface that determine how digital and items are treated worldwide.

Taxes
There may be rules and regulations you may need to follow, so be sure to check your local and international laws.
Weebly gives you a quick and easy way to set up taxes. You can add the tax rates for locations so that the tax can be accurately tallied at the time of purchase.

For sales within the United States, Weebly will calculate your taxes automatically. However, for tax rates outside of the U.S., you will need to set up the tax rates manually.
Store Emails
If you’ve ever shopped online, you’re probably familiar with store emails. You get an email when you place an order, when it’s confirmed, when it’s shipped, etc.
The Weebly store does all that for you – you don’t even have to compose the emails! Each Weebly e-commerce store comes equipped with a set of automatic stock responses for the basic customer emails.

You should go to the Store Emails section of the Store Overview page and complete your sender profile and Order Notifications section. The former will make sure that if a customer replies to the automatic emails, you will receive it, and the latter will send you notifications when an order is placed. Both are good to have if you want to run a successful online shop.
Launching Your Store
Now that you’re prepared – you’ve entered your site information, set up payments, configured your emails, and more – you’re ready to publish your site.
Publishing with Weebly is as easy as clicking a button. All you need to do is go back to the main drag-and-drop interface and click the big, blue Publish button.
And that’s all there is to it. If you’re interested in setting up a Weebly e-commerce site, but don’t know where to get started, you can reach out to our sales team for more information.
If you already have a web hosting account, our support team will be more than happy to assist you with any technical problems you run into.
Can’t decide between Weebly, ShopSite, and WordPress? Stay tuned! We’ll be publishing more blogs talking about the e-commerce aspects of each.
